
Movement analysis
made easy.
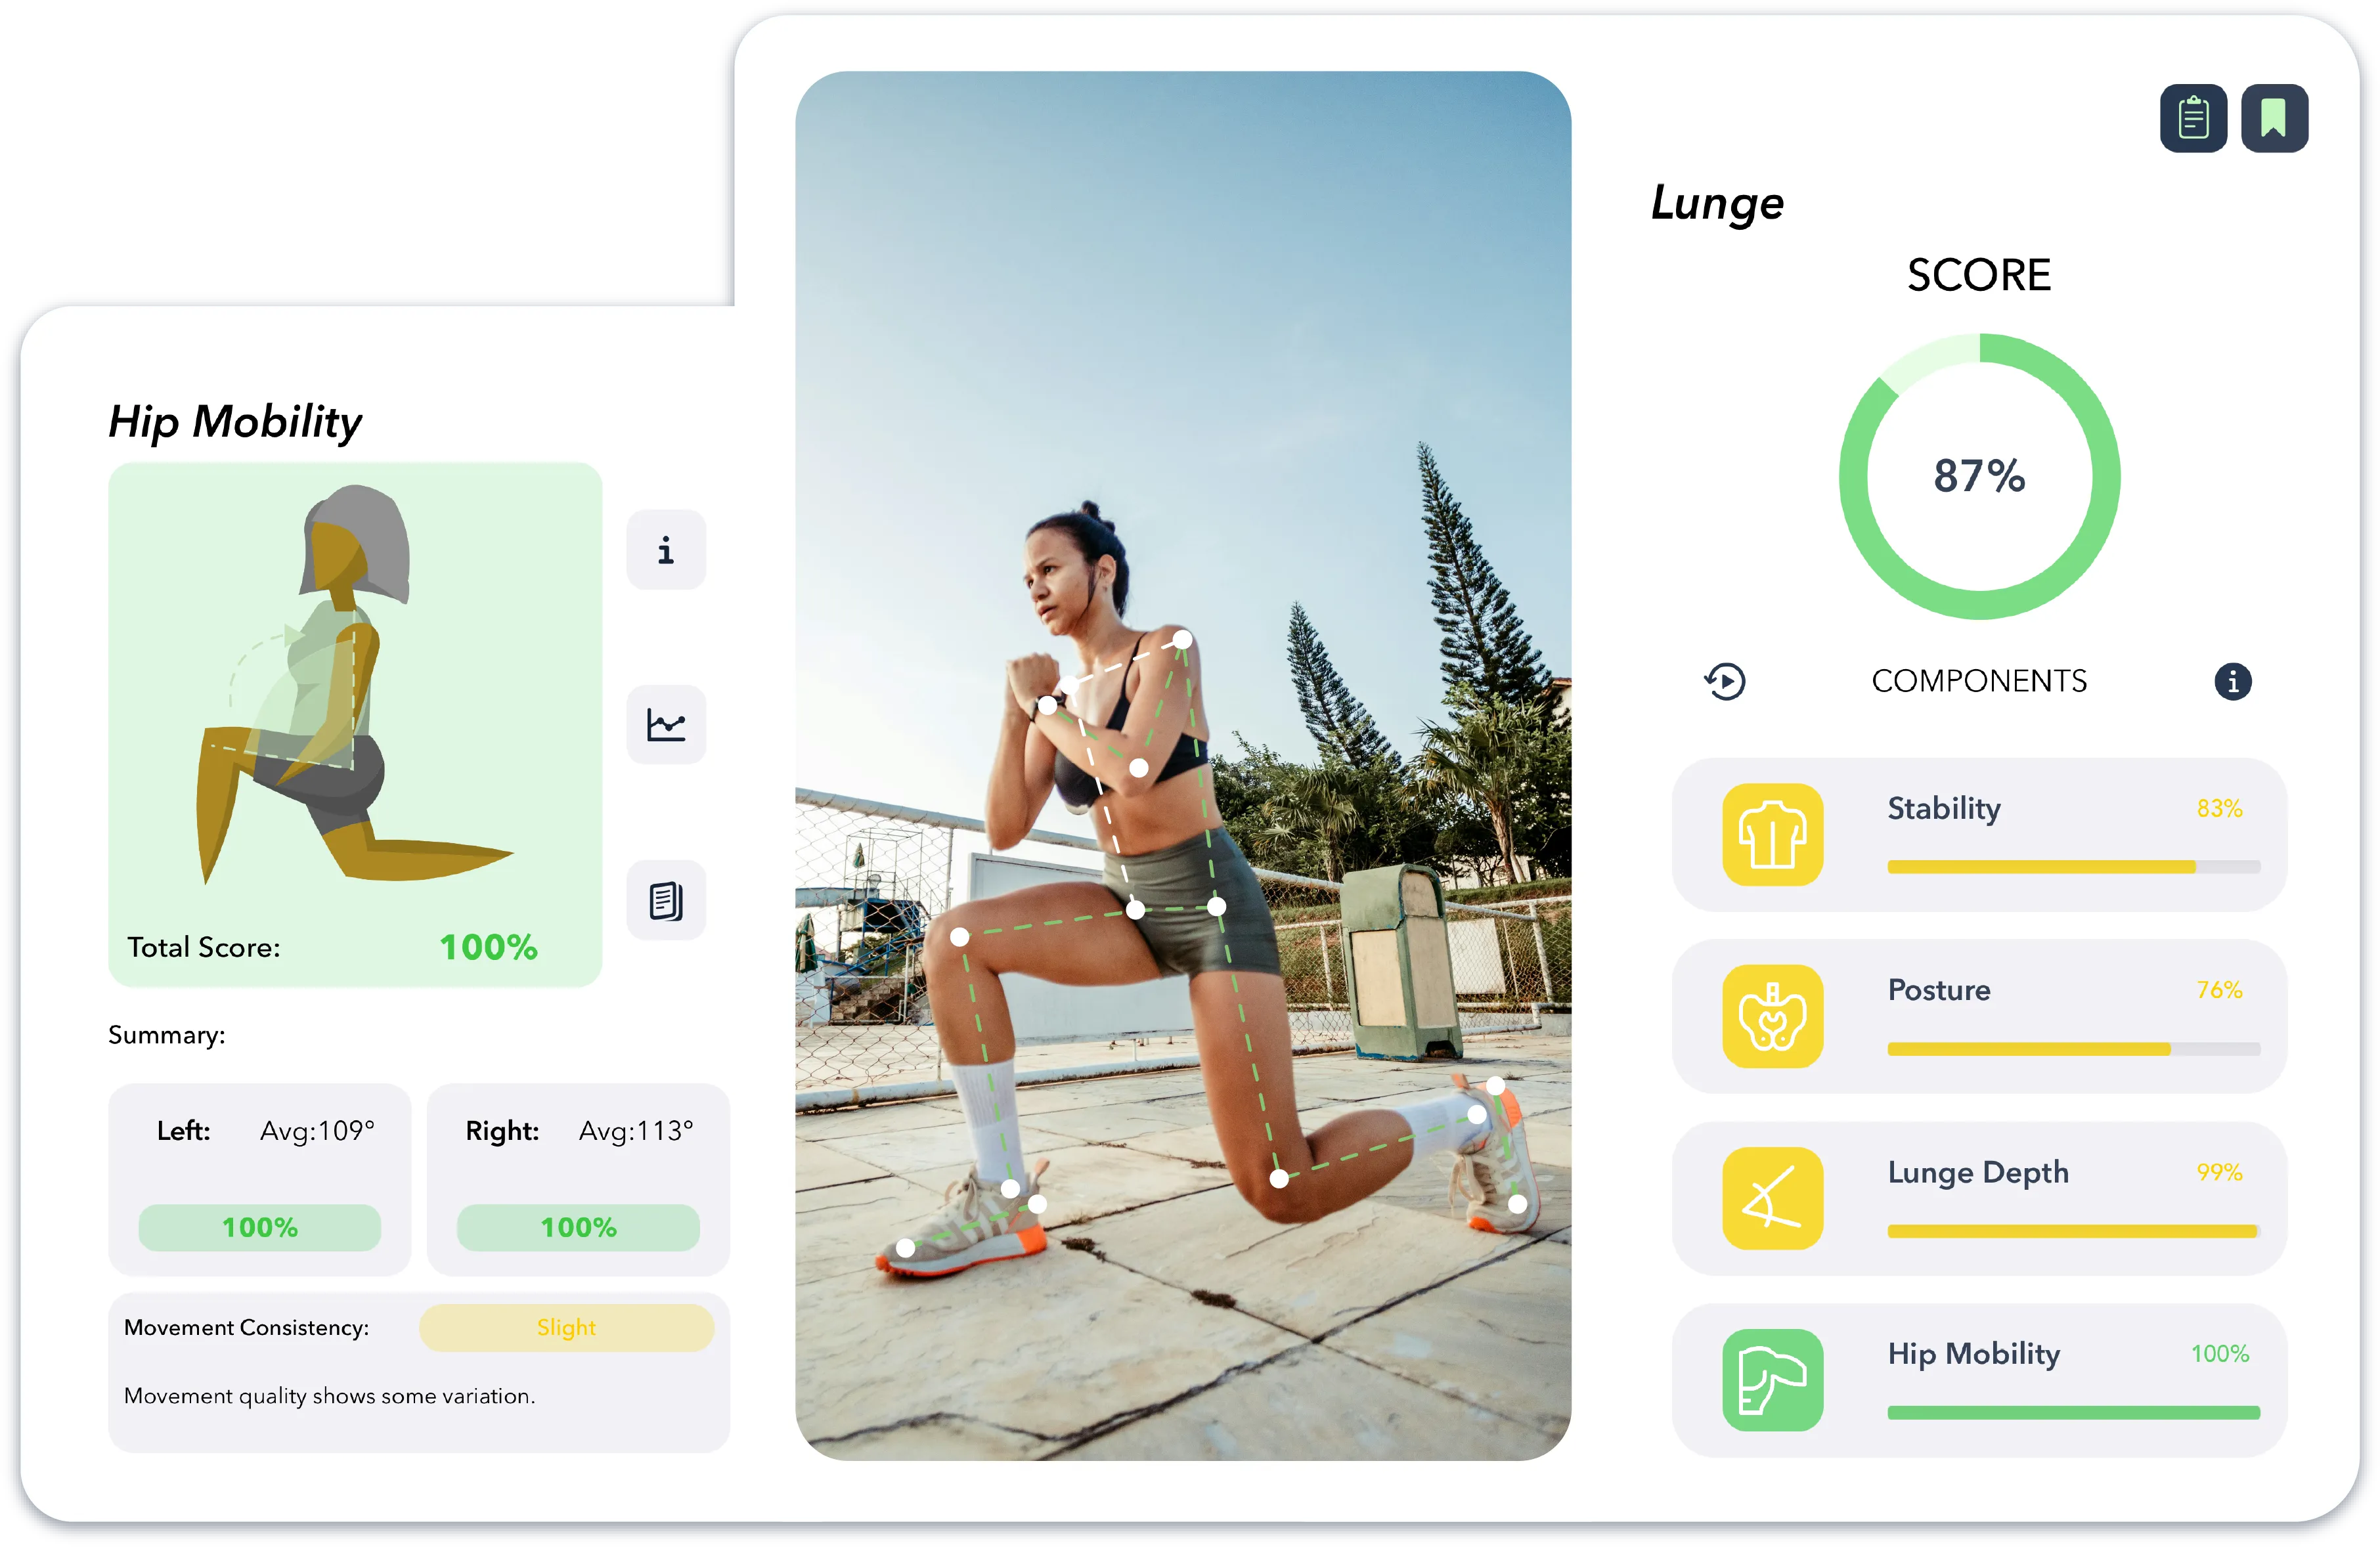
Track form, gather data, and analyze movement for any sport or activity in seconds. With AI-powered screenings, get instant scores and insights whether you’re training in person or online.
Heal. Maintain. Excel.
Our software solutions will help you get the most out of recovery, enhance training, and prevent injuries. All from just your phone.
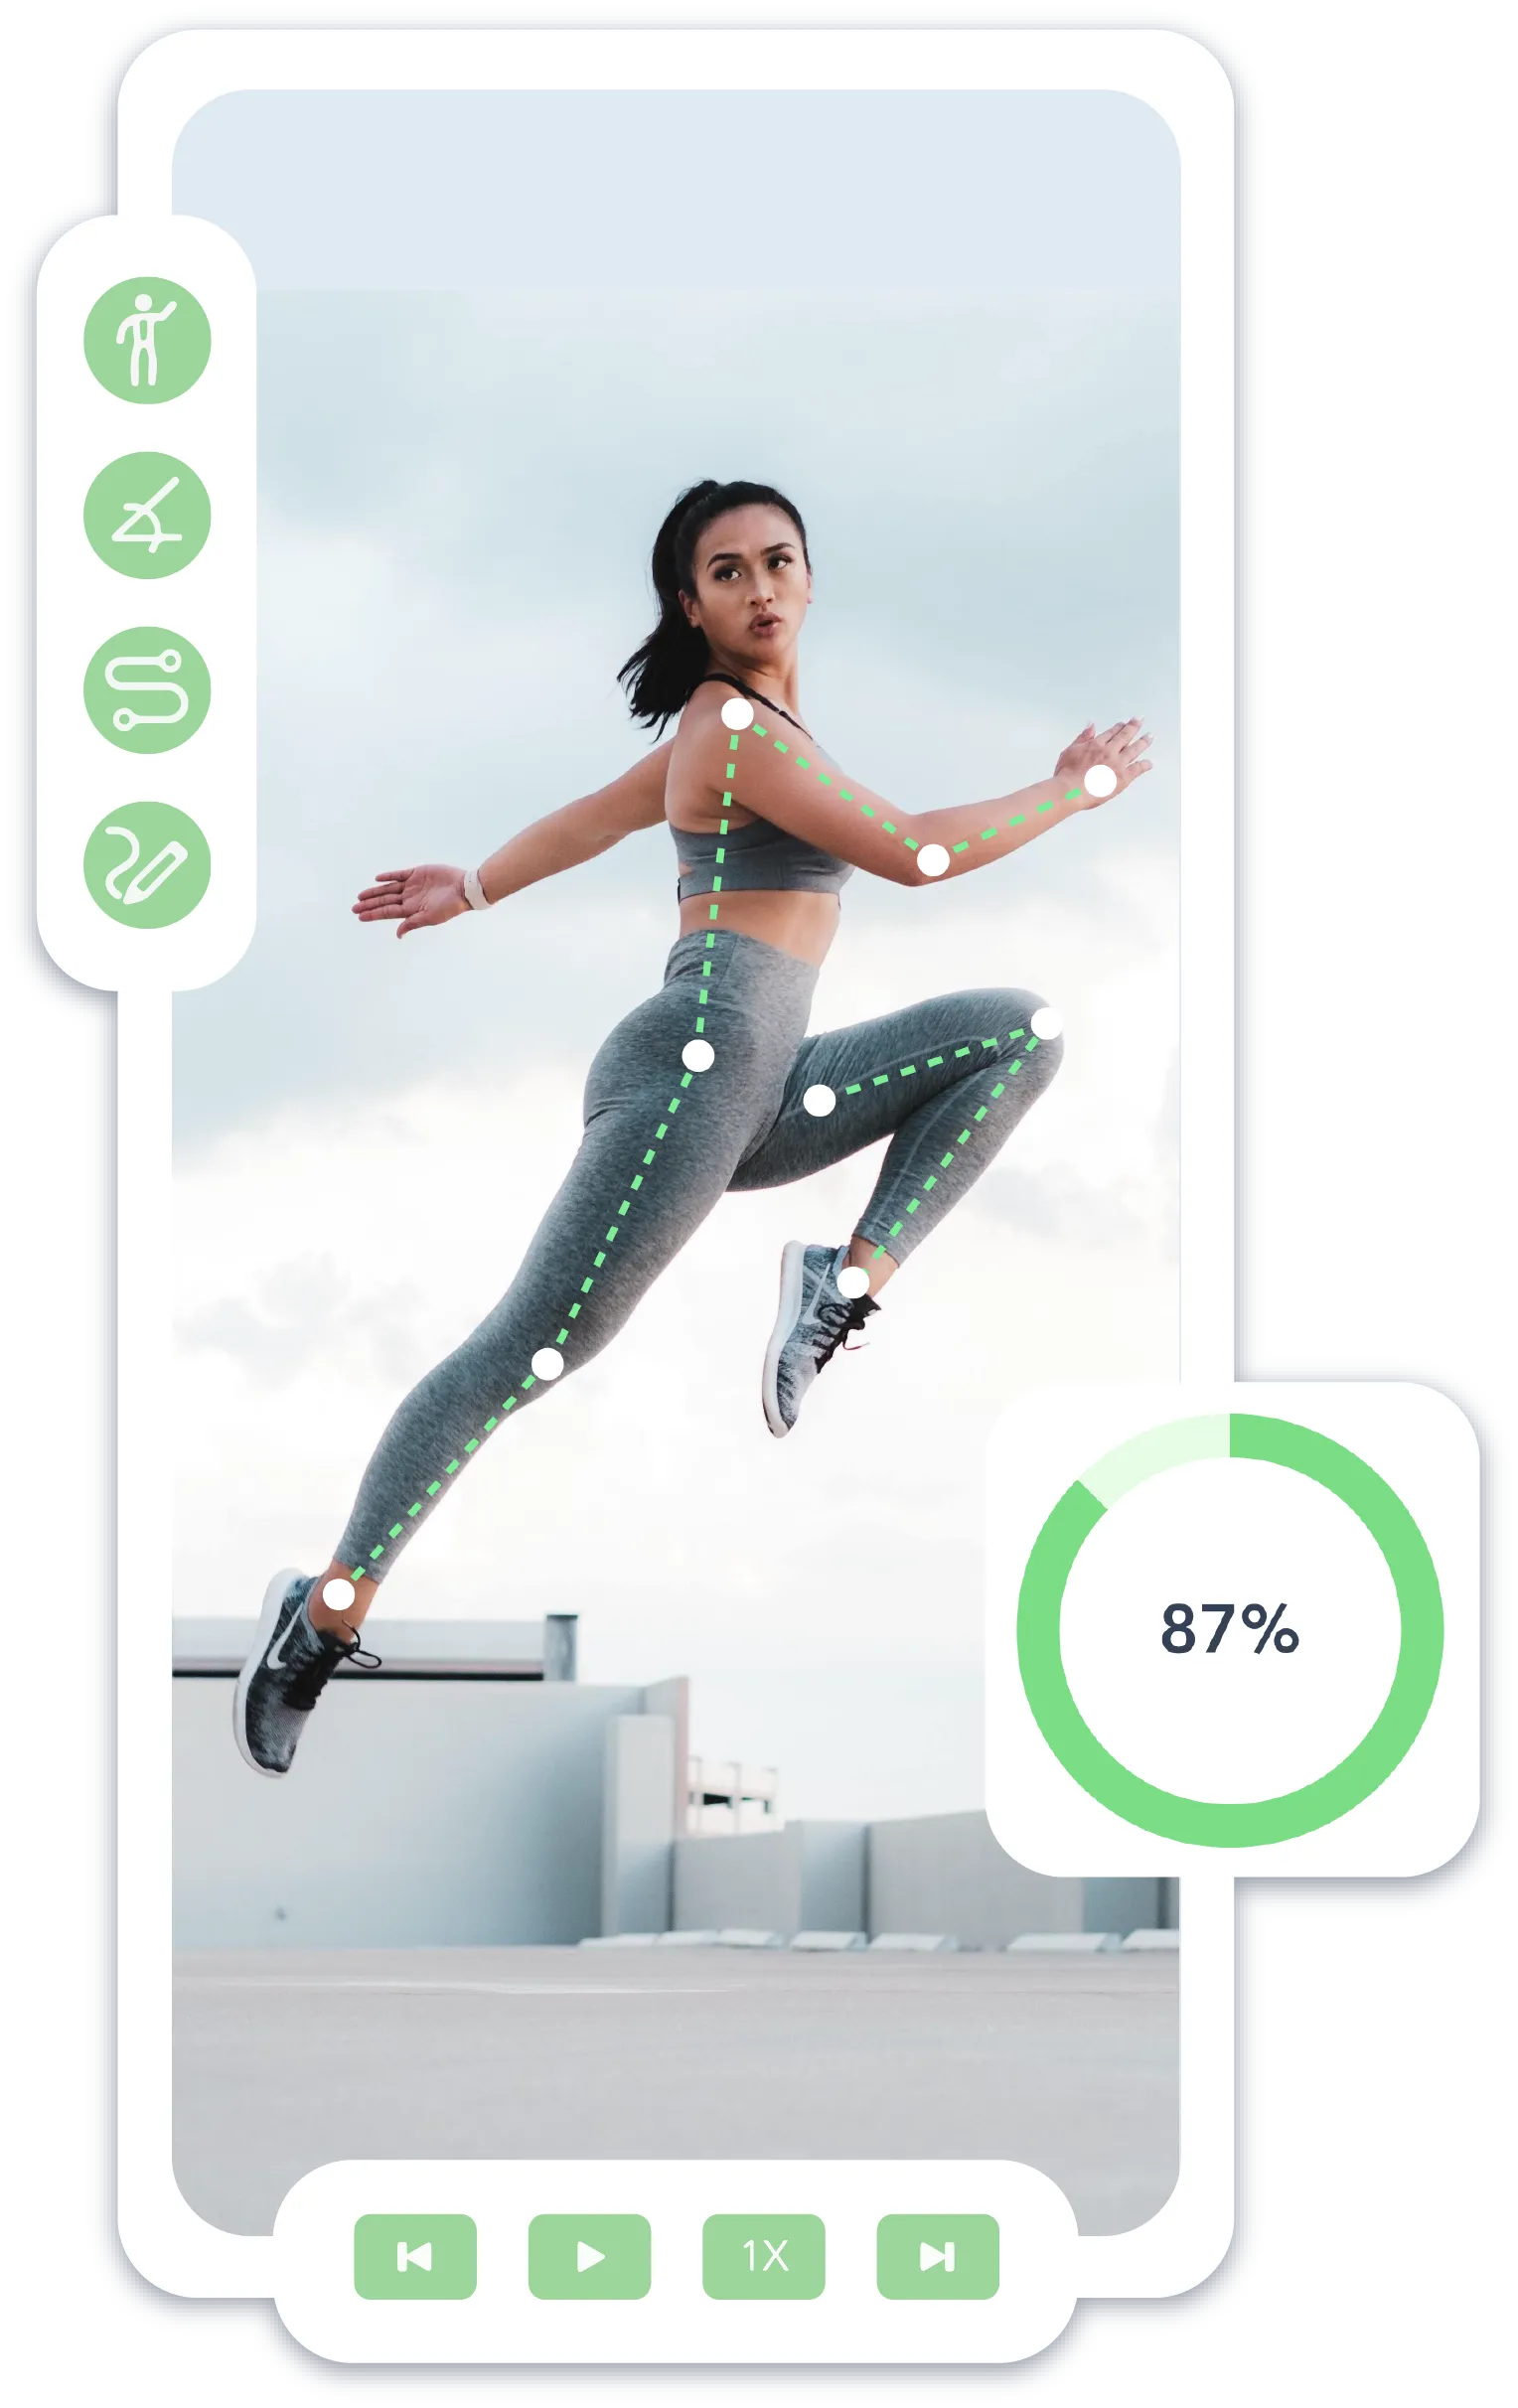
Video Analysis
Precision Movement Analysis, Anytime, Anywhere
Yogger’s video analysis tool is a versatile suite designed for coaches, trainers, physical therapists, and athletes. Analyze movement, critique form, and gather precise data with tools for any sport or activity.
Explore Video AnalysisAI Joint Tracking
Visualize movement with skeleton tracking

Range of Motion
Automatically gather and export data

Drawing Tools
Simple tools to get the best analysis

Virtual Assessments
Screen Movement Anywhere in Seconds
Streamline your client evaluations with Yogger's automated movement screenings. Our AI-powered screenings deliver objective scores and data in 60 seconds, whether your athletes are in person or virtual.
Explore Virtual Assessments
60 seconds
In just 60 seconds, get your score and results

Actual Data
No more eyeballing. Get real objective data to track.

Perform Anywhere
Assess at home, in the gym, or across the world!
Get started today
Interested in learning more about how you can utilize Yogger with your business? Book a call for free 1:1 demo.