Recording and Uploading a Video
Introduction
Recording and uploading videos are the primary functions of Yogger. This is the gateway for analysis and the starting point to take advantage of all other features Yogger has to offer.
Location: This feature is found in the “Record” tab of the bottom tab bar.
Purpose and Functionality
The intended purpose of recording is to gather video footage to perform analysis on. Additionally, it provides a way for the user to upload previously recorded video for analysis.
How to Record a Video
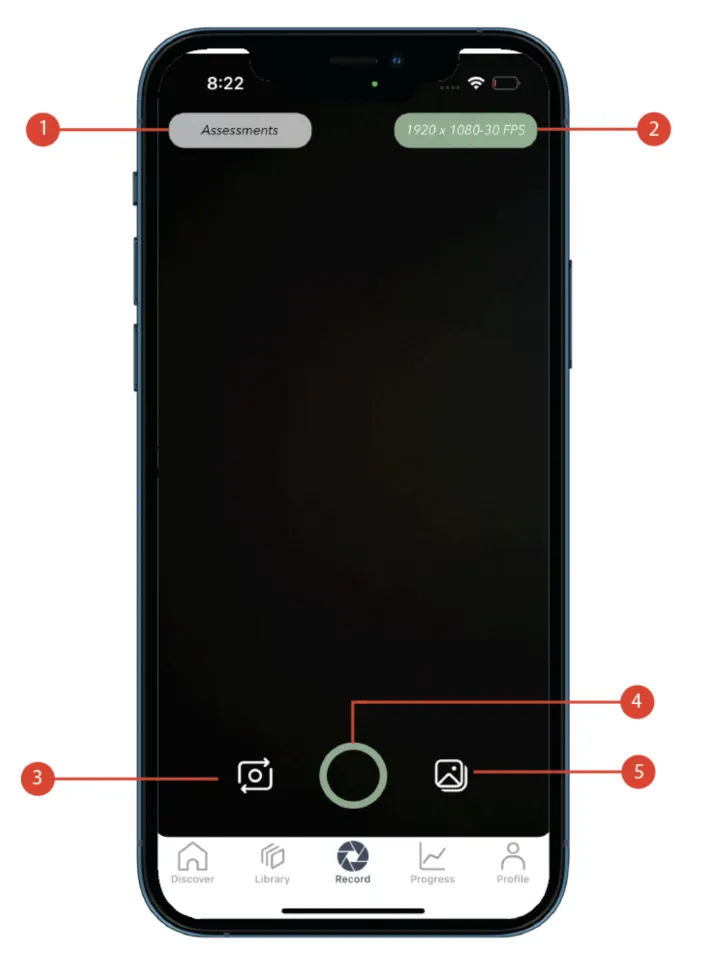
First, navigate to the “Record” tab in the bottom tab bar of the app. This is the first view that is open when you first launch the app. On the initial app open, the app will request access to the camera. If you deny access, you will not be able to record videos; however, these settings can be changed later on.
Giving Camera Permissions
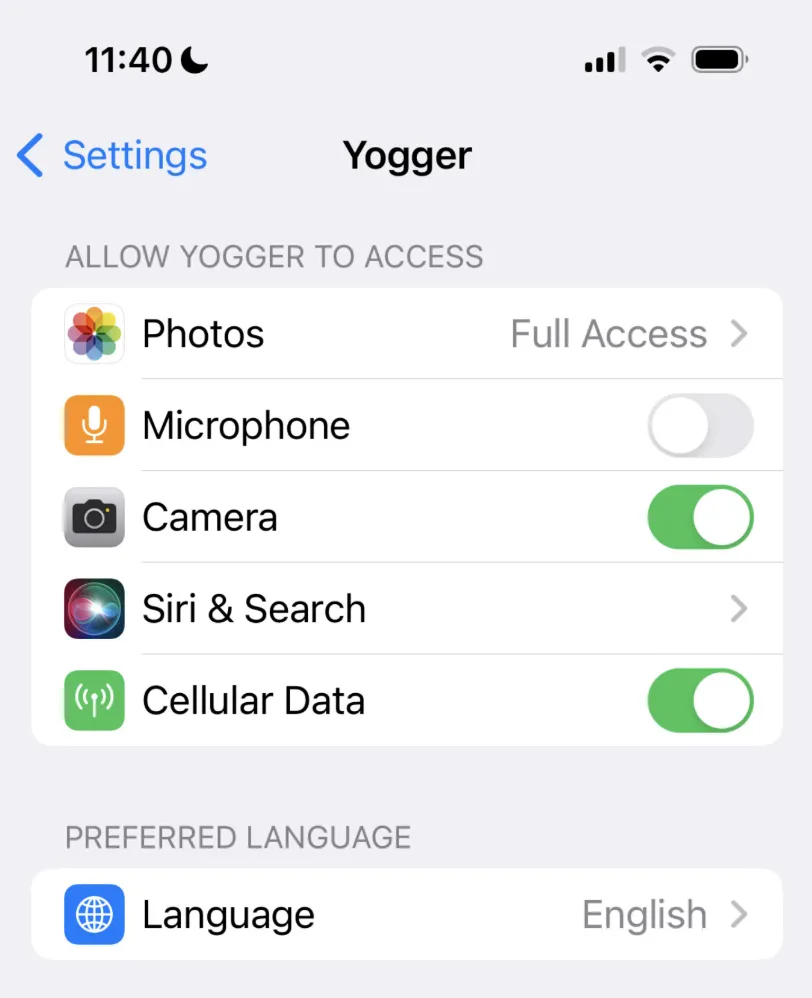
To give Yogger the ability to use your camera, follow these steps:
- On your iOS device, go to Settings.
- Search for Yogger in the top search bar.
- Select Yogger.
- Grant permissions for different types of access that Yogger uses.
Changing Recording Settings
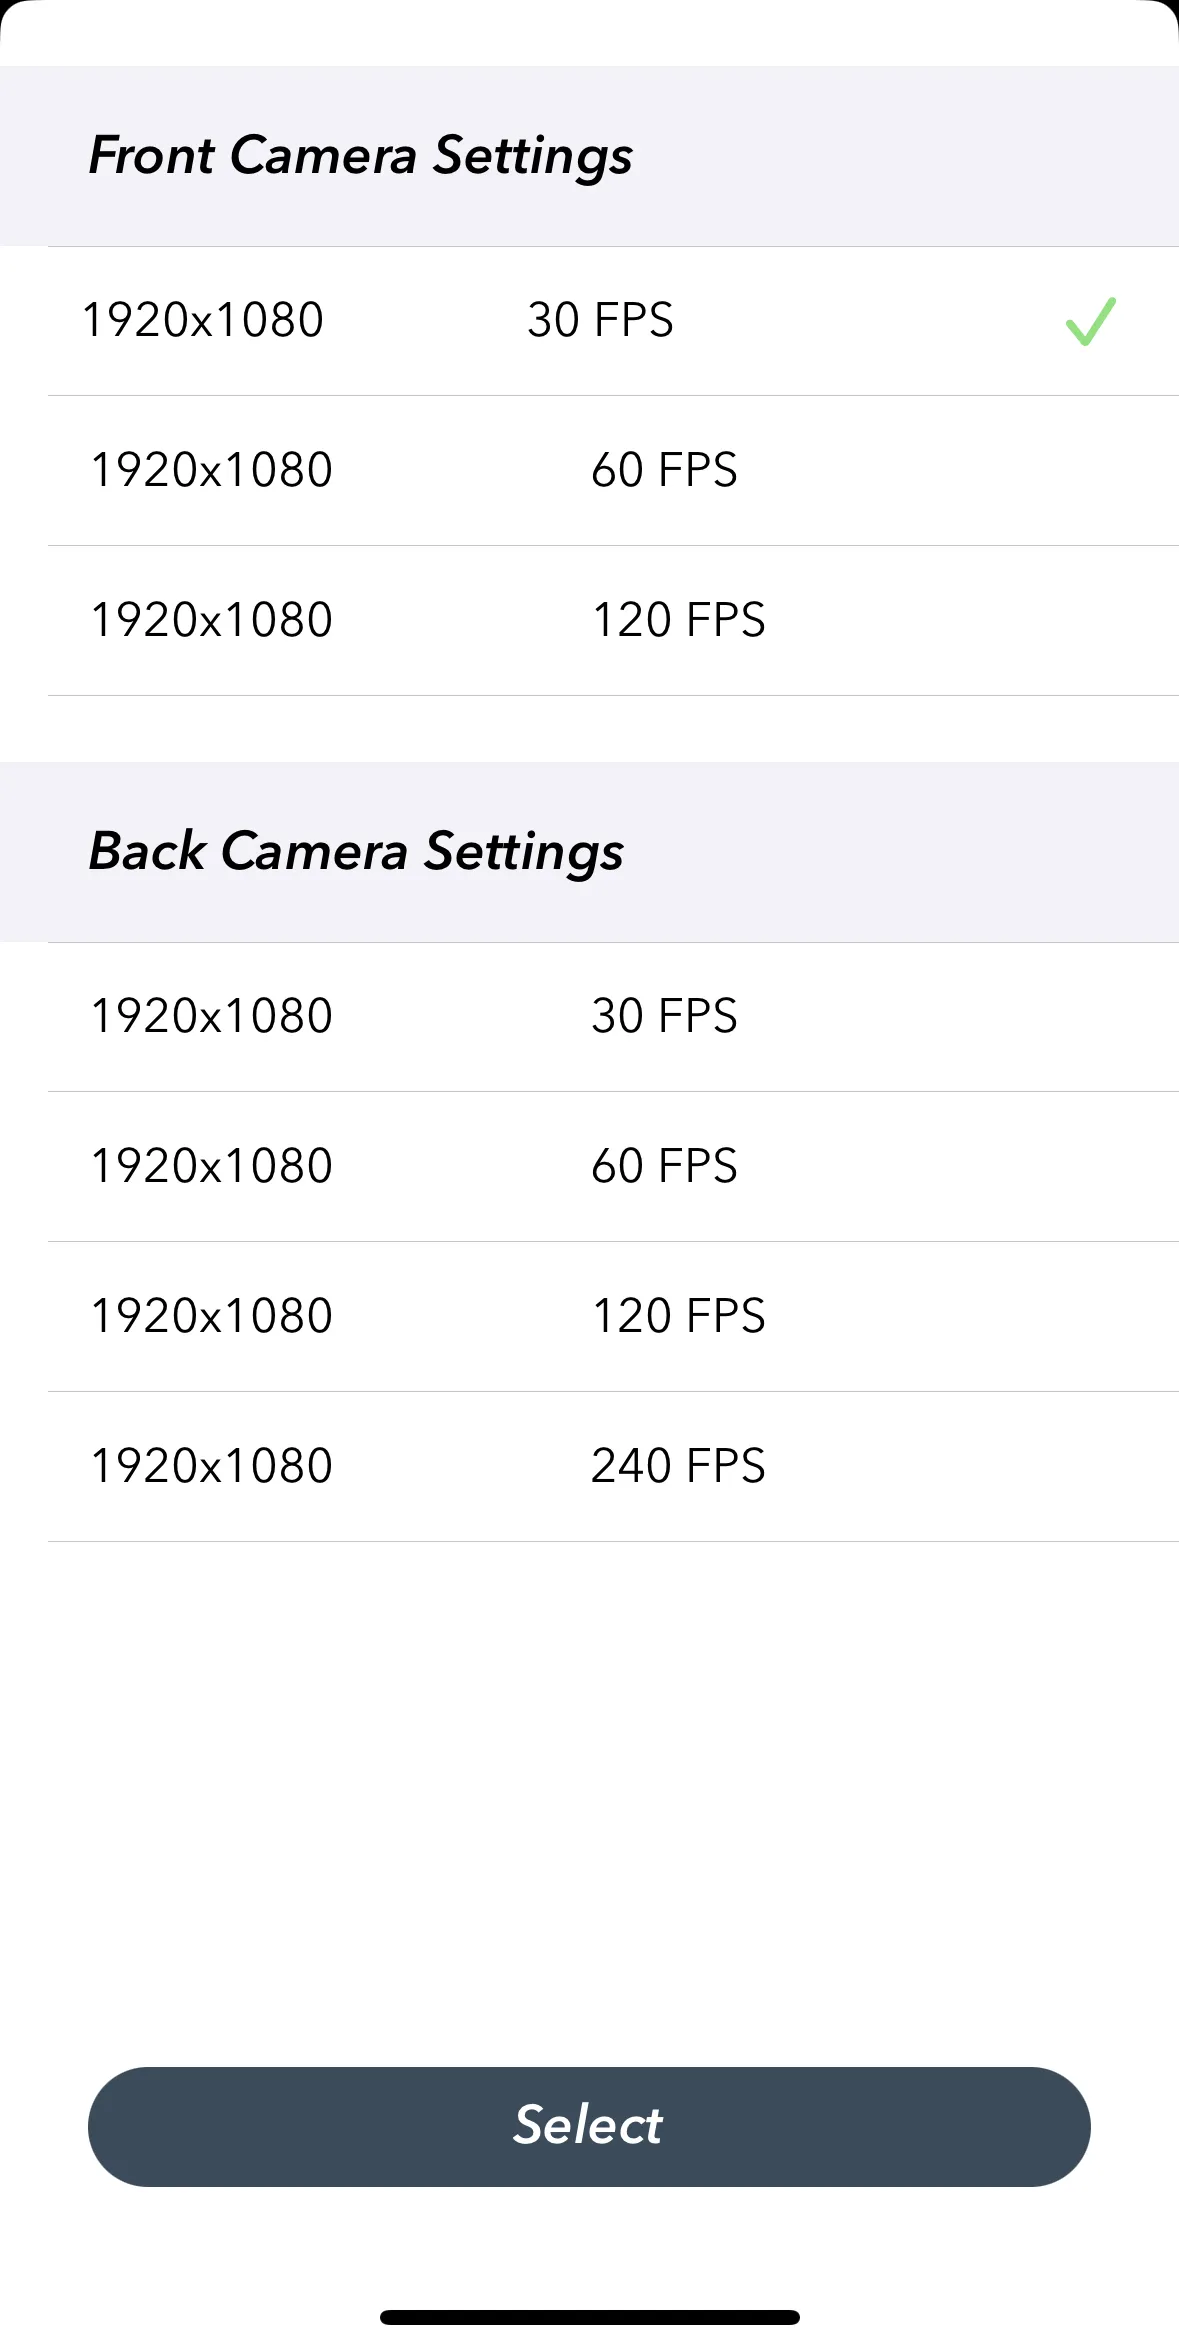
You can change the camera settings using the settings button. This allows you to use a different frame rate or change the dimensions of the video recorded. Note that on most iOS devices, there are separate specifications for the front and back cameras. Check out your specific device’s camera configuration at Apple iPhone Specs.
The default option for the camera is 1920×1080 at 30 FPS. This setting is commonly used for high-definition video recording with good quality and smooth motion, suitable for most situations.
For more explosive or faster movements (such as sprinting), Yogger works best at a higher frame rate. Any frame rate over 30 FPS should suffice. 60 FPS offers smoother video suitable for capturing fast action or for creating smooth slow-motion effects when played back at a lower frame rate.
Uploading a Video
You may also choose to upload a video. This may be the best option as you have more control over the footage, FPS, and quality of the video. Yogger works with any type of video; however, it may compress the footage to enable smoother tracking in the playback view. Ensure you allow Yogger to access your camera roll to select videos on your device.
Tips and Best Practices
The camera operates best at the default settings. Increase the frame rate for more explosive movements.
- Record a video of a movement.
- Upload a previously recorded video of a movement.